Sunday, 28 April 2019

Fight Fears - created for ScrappingClearly

Hi SC friends!
Can't believe it's the pointy end of April, Crazy!
Today I have a layout I hope will inspire a little end of month creativity for you all.


I kept my background work very easy and simple. Firstly I started by applying Modelling Paste through a stencil allowing to dry naturally.

Then I went in with my stamps. I used a Face from Dina Wakley's interesting faces collection and a script stamp I have.


Then I proceeded to create my layers under my image. I used a few tags from in my stash but also created tags from Ella & Viv papers to bring out some of the colours in the photo, I also tore a couple of pieces and tucked these into my layers also.


In amongst these I tucked in Some Pink Fresh Fabric dies from the 'escape the ordinary' range, little arrows and tags poking out from the layers, creating visual interest.


The metals (1 from Tim Holtz and the other Finnabair) I painted in black Gesso and then rubbed Prima Wax over them, love the metallic sheen this creates. I also applied this technique to my chippy.


Finally a few Tim Holtz small talk stickers and a few flicks of Distress Oxide in Broken China this page was complete.

A great way to use up left overs in your stash and play with new items too. 
You have until midnight tonight to join in this months moodboard challenge, so if you can we would love to see your creations.

I'll catch you all on the Scrap side very soon, till then, Happy Scrapping!
Em xx


Moment - with Emma for 2Crafty

Hello all you 2Crafty friends and welcome to Thursday!
Today I'm sharing a boy page that really showcases the awesome chipboard (be sure to check out the video for this page too).
I have kept papers to a minimum and let the chipboard really shine.


Let me tell you about some of my finishes but firstly I want you to see what chipboard I chose....

Steampunk Arrow Set
Steampunk Gears small
Lightbulb Word Set
Bracket Frames


So lets start with the Bracket pieces. For these I simply used emboss powders, instead of using just one colour I chose 2 that really contrasted from each other.


Again I totally embraced the imperfections.
These 2 colours just bounce off the chipboard very beautifully and of course off the page against the white.


For the Steampunk Arrow I cut it in half to elongate it behind my image. I coated this with some Rust effect pastes, building as I went. Once dry I rubbed a little Metallique Wax over certain areas to highlight and add shade.


The Steampunk Gears and LightBulb I painted with black gesso, once dry, I dabbed complimentary wax's to give them this rusty gear look.
The Bulb I decided to use a 2 tone effect by applying with my finger.


The mediums used on the chipboard really pronounce themselves off my page.
I loved playing with mostly only Chipboard, really making this the main focus of my page.
I hope you are a little inspired by this layout and don't forget to check out the video to see exactly how it all came together.


I'll catch you all soon. Em xx


Monday, 22 April 2019

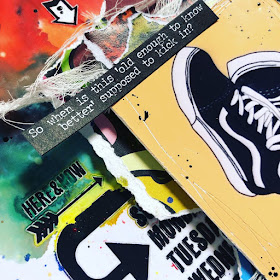
Kick Back - with Emma for scrappingClearly

Well the long weekend just flew past!!!
Did it even happen? Hmmmm…...
 Sadly I didn't get a lot of time to be creative, but I did get some time to get a little inky and create this page for you all today.


Oh boy did I get inky! I started off by priming my cardstock with clear gesso.
Then I pulled out lots of my Distress Oxide Reinkers! Wow this was so therapeutic and fun. 


I applied a little water to the background first and then 'painted' with a watercolour brush the oxides. Layering, dotting and blending the colours together.
I had applied my remaining Tim Holtz Remnant Rubs before I started this procedure, and I just love how they resist the inks so they stay prominent.


Behind my photo I ripped a couple of different grunge papers from the Ella & Viv range. And I had a left over WRMK frame that I tucked into the layers also.


The flags are from Pink fresh and I loved the texture this gave to the page. They complimented the photo with the denim vibe.


The quotes are the ever favourite Tim Holtz small talk stickers, this time I used ones from the 'snarky' collection.


Lastly I added a few splashes of black Liquitex ink over my photo and page to bring it all together.

That's this little beauty all complete.

Don't forget that we have another awesome Cyber crop happening this week. we would love to see all your creations for these awesome challenges.

I'll see you again next week.
Happy Scrapping, Em xx


Look for the Magic - created for ScrappingClearly

Hi beautiful people!
Today I share another take on the mood board, this time really embracing the Green.
First though lets refresh our minds on the glorious board.


Here is how it turned out (I added a touch of Gold too)…..


So to start this project, oh I have a little video process for this page also, so please check it out, I applied Clear Gesso first, then with Modelling paste through a Tim Holtz stencil I created texture highlights.
Then once dry I added a Distress Oxide Re inker dotted, water sprayed and smooshed over the background. Once this was dry I used a Gold crackle texture paste through the same stencil as the beginning. Adding small highlights and pops of colour.


Behind my image I trimmed and layered a Heidi Swapp Kraft tag which I distressed and inked. In these layers I also cut Oxide inked this time with Cracked Pistachio and stamped Heidi Swapp die cut sheets.


Then the magic happened! I played with the very awesome Tim Holtz Transparent acetate wings! Oh WOW!!!


Stunning right!
I trailed this up my page complimenting the photo image.

My title went on and some quotes from Tim Holtz Small talk stickers completed my look.


I really hope you get inspired to create with this months mood board if you haven't already.

Please check out my video for this page and leave some love.


I'll see you all again next week.
Till then Em xx


Saturday, 13 April 2019

Whispers in the breeze created for ScrappingClearly

Hi, Emma here with you all today.
Today my share is inspired by the mood board of this month.
Lets just see this beautiful board shall we?


Stunning isn't it!
Here is my version....(the light wasn't the greatest today for the photo, so I apologise for the slight shadowy look).


The colours are just Divine and I couldn't wait to play.
Using up some supplies I had, I decided my background be kept simple.
I used Tim holtz Remnant rubs 'life quotes'  and rubbed only sections I wanted from the sheet.


Then I added my colour. For this I simply used Distress Oxides smooshed over the rub ons.
I have 5 colours for this, Cracked Pistachio, Chipped Sapphire, Faded Jeans, Peacock Feathers and Twisted Citron.


Love how effective this is without much work ;)
Once dry I started to add my elements and image.


For the layers behind my image I used up my last couple of pieces from Heidi Swapps Magnolia Jane pack. And a couple of cut pieces of Heidi Swapp die cut sheets which I opted to leave white to be more prominent on top of the colour background.


Finally to mimic the 'drops' in the image I added some Melange (clear pebbles) in the same pattern.


Another page complete, and inspired by the mood board. 

I'll see you all again soon.
Till then, Em xx