Friday 28 January 2022

In the Garden - Created for 2Crafty Chipboard

  Hello 2Crafty family. Emma with you today.
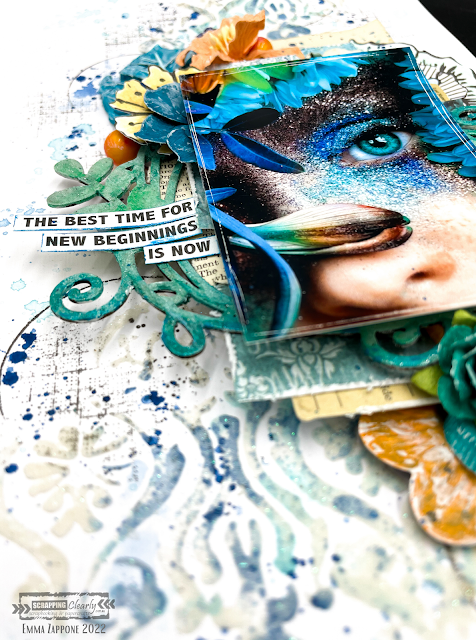
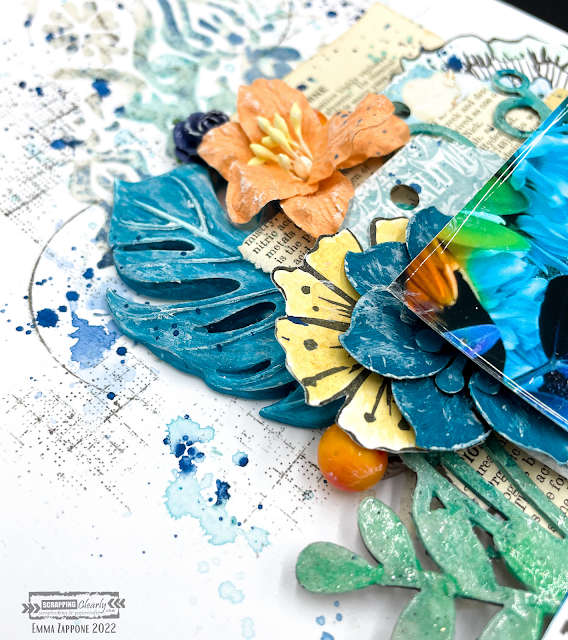
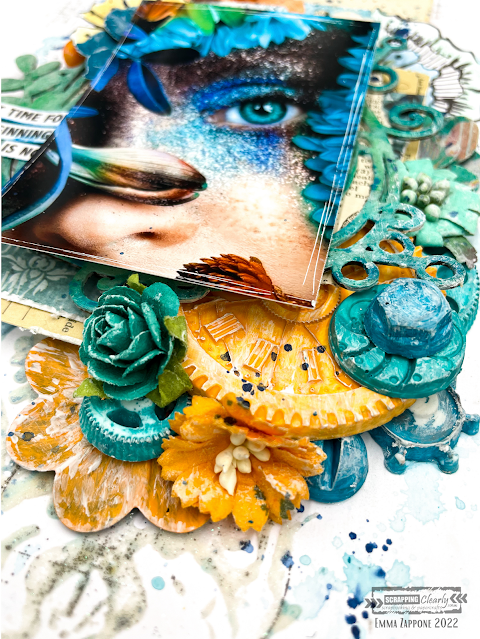
The Layout I'm sharing today is a floral garden vibed creation using some stunning chipboard pieces.


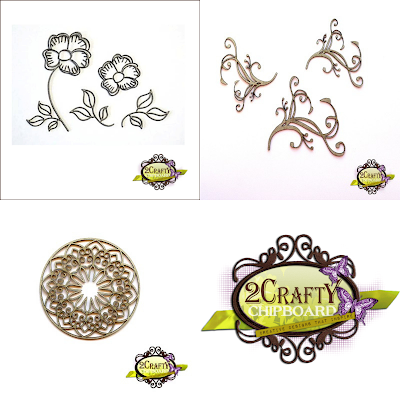
And here are the pieces used....

Hand Drawn Flowers
Florence Swirl set
6" Mandala No.3


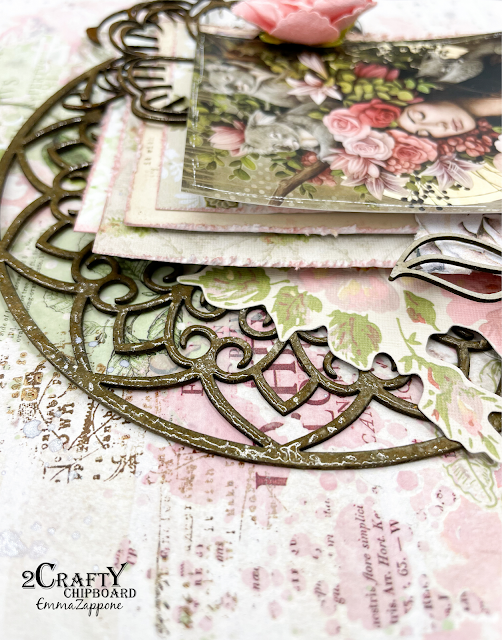
This page is an 8"x12", a format I'm starting to play with more and more.
I was going to leave all the chipboard raw originally, which I very rarely do, but I just couldn't do it....well not all the pieces anyway.


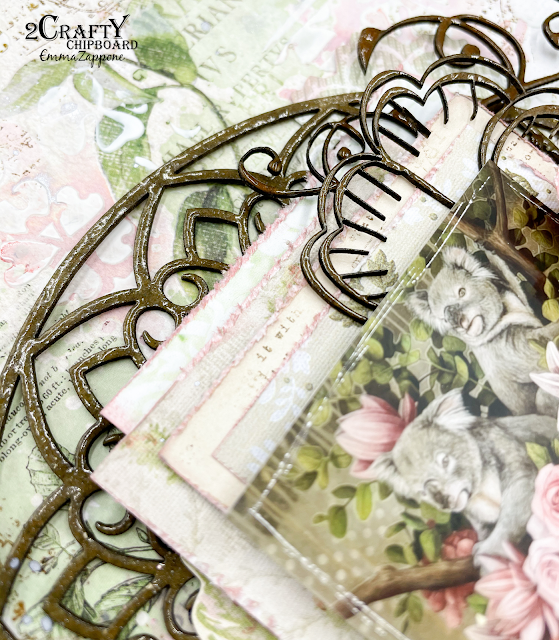
So instead of leaving it raw, I added a glaze over the larger pieces of chipboard, such as the Hand Drawn Flower head and the Mandala. No priming of the chipboard just emboss ink and a glaze. 


Adding a double glaze to the Florence Swirls really added some beautiful shine.


The leaves that I trimmed off the flower were left raw, they added a 'colour' tone all on their own, this way they stood out against the darker glazed pieces.


I hope you are inspired by my page, and get some creative time this weekend.
I look forward to sharing my next project with you all very soon.

Stay crafty, Em xx


Thursday 13 January 2022

Room for the Unimaginable - created for ScrappingClearly

 Hello SC friends.
Emma with you all today. I have been loving the projects coming through featuring this months mood/sketch. Amazing!! Loving all the Travellers Notebooks too. I'm hoping to start this weeks prompt today. Today's share though is featuring the sketch part of the mood board. I chose to pull the orange tone out of the moodboard also. This Layout is made as an 8"x8".


I used some great products to play along with the sketch, let's just refresh our minds of this months mood/sketch..........


Oh and I flipped the sketch! 
And I decided to place my title at the top of my design for reasons I will mention later in my blog.
Right now lets talk about what product is found on this mini layout.


After I had layered some rubons from my stash, I grabbed the beautiful  'Elegance' stencil by Aall & Create and with a makeup sponge dabbed Dina Wakley's Buff acrylic paint through it. This created a beautiful soft shadow over the patterns on the page. I did this both top and bottom of the page.


I then took one of the little script stamps by Aall & Create and with Stazon 'Spiced Chai', stamped rhythmically over the same area as the stencil. The stamping was also blended out through the page.


My paper elements needed to be small to match the image and the size of the overall project. So I tore some book paper to mount my image on and then chose a few pieces from an Ephemera Pack of Tim Holtz's. These are full of different shapes and make for great tucking and layering.


This stunning Mould that Kylie sent me is painted with another one of Dina Wakley's paints this time in 'Elephant'. Once dry I rubbed Metallique Wax - 'Bronze Age' very lightly to only pick up the raised parts of the mould. This is why I chose to move my title as I really wanted this mould to shine on it's own. I finished the page with a few more elements from my stash and then flicked watered down 'Dried Marigold' Distress Crayon and Dylusions Ink Spray 'Ground Coffee' to bring all the elements together.

I hope this has inspired you to have a go of the months sketch and make it your own.

Have fun creating everyone. I will see you all next week.

Stay safe, Em xx


Sunday 2 January 2022

New Beginnings created for ScrappingClearly

 Welcome to 2022!!
ScrappingClearly has got some awesome things planned for everyone this year.
And today I'm sharing with you an A4 layout and a Video that has been created using inspiration from the absolutely awesome NEW mood/sketch for January. The colours scream summer and fun!
Here is what I was inspired to create......


Here is the mood/sketch...


Super cool right???
I decided to focus on the mood part of this board, and save the sketch for later in the month.

I used lots of products in my stash but also available in the SC shop. Firstly the stencil I used is a Finnabair stencil Oriental wall used with snowflake paste. Soft and glittery which was a great base to start with. Then I smooshed colour. I chose to use 2 colours for the background work. First is an Izink pigment in celestial and then a Distress crayon in Peacock Feathers.
These worked so well in with the paste.


Ok, so I LOVE moulds and this page incorporates plenty. I used a variety of different ones, but love the big palm leaf and of course the machine parts one. These are painted with Dylusion paints in a mix of Squeezed orange Polished Jade. The metal Finnabair mechanical flowers were primed with white gesso first and then painted with the coloured acrylic also. 


I added a little stamping onto the background to add more layers using the Tim Holtz Glitch1 set. It's grungy but goes with just about everything. I love the texture it brings.


The chipboard frame is one I have in my stash and I primed it with white gesso first and then with complimentary Distress crayons 'coloured' it in. Then sprayed with water and painted out the crayon, which created this cool blended watercolour effect. Then it was clear embossed.


In the video you will see me use a flower stamp by Art by Marlene and then coloured with more Distress crayons and then cut out to help build my layers. I absolutely love the dimension of this layout.
The papers that mat my image are what I have in my stash, and I love adding book paper for that slight reference to vintage style that I love.

I hope you are inspired by this project and the amazing board that is available for you to play with NOW!
I hope you enjoy watching this project coming together too...watch now with a cuppa....


I will see you all very soon.
Stay crafty friends, Emma. xx