Thursday 31 March 2022

'Somewhere over the Rainbow' created for ScrappingClearly

  Hi there everyone.

Who would have thought I would enjoy creating the Travellers Notebook pages so much! 
Now I love the quick little art moments.
This one didn't quite go to plan, but I'm still loving the final feel.


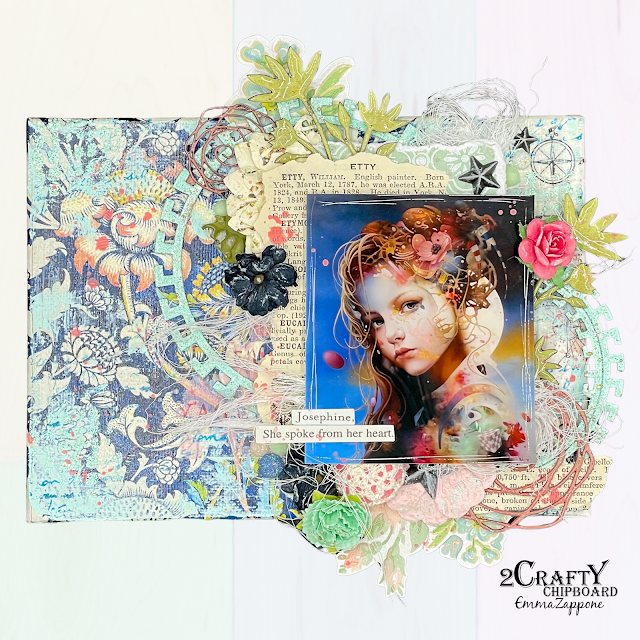
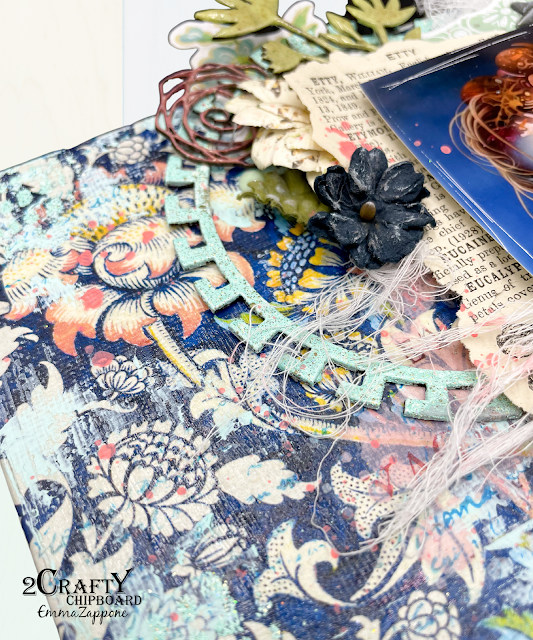
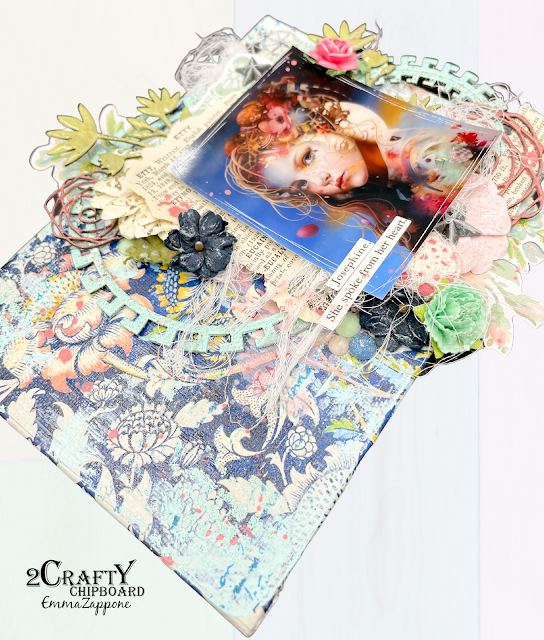
I started with a Scrap FX tissue paper for my background. Applied it down to my pages with a gel Medium. Then I began to scrap some colour over sections of the pages with a mix of Dylusions and Art By Marlene paints. I did this very simply with a palette knife.


I added a little stencil work using an ABM So-fish-ticated stencil with light modeling paste.
You can see all the process in my video.


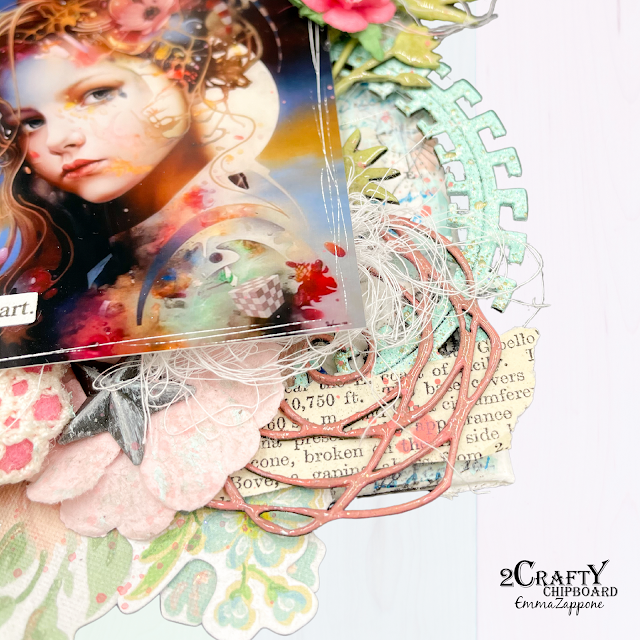
This weeks TN prompt is handwriting and it made me nervous. I was not sure how to add this element, so I decided to add some script along my scribbly border. It's messy but it added to the grungy vibe of the pages.


I hope this has inspired you to try this weeks prompt. We love seeing everyone's versions.

 Check out my video here....


Have a great creative week.
Stay crafty, stay safe.
Em xx


Wednesday 30 March 2022

'Alice' Created for 2Crafty chipboard

  Hello everyone.

Emma with you on the blog today with a 12x12 Layout and Video.
Here is what I'm sharing with you today....


And the beautiful chipboard used.....

Fine Floral Corner
Lorena Corner
Mini Decorative Frame set 6


The image I used today really inspired the whole story behind this project. It is by an amazing artist named Femke Muntz and they are just the best melancholy artworks.
The girl in the painting had an emotion I could match and feel. But yet a softness and vulnerability.
So I wanted chipboard to match the softness and yet fill the page with hope.


The chipboard all had a similar finish to them, but also an individuality.
The Lorena corner was painted with a liquid acrylic paint, then stamped with black ink and a script stamp and then had a clear glaze over the top to add super shine.


The beautiful delicate mini frame had the same finish as the corner piece except instead of a clear glaze I added a emboss glaze in a tattered rose colour, which deepened the colour and mage it a beautiful feature to the page.


Finally this stunning Fine floral corner was cut into 2 pieces and had a denim blue acrylic painted over it. No stamping was done on these, but a double quote of clear glaze was applied that added life to the florals of the piece.


I love that I have become a story teller in my scrapbook art. And I do this by using small quotes to create the story of the page. This one is - 'Alice, She merely went on with her life, to the best of her ability where only the imagination can go.' 


I think you will see more of this style artwork included in my projects. 
I hope you enjoy the process video too.


Have a great week everyone, and I will see you soon.

Em xx


Thursday 24 March 2022

Entomology Tag created for ScrappinClearly

 Hello everyone.

Today I share a video and a tag created using a mix of products you can find in Kylie's shop.
It focus's on Stamperia product, resin and texture.


This tag is approx 5"x7" and created on packing board. Nice & Sturdy.
It is then primed with some white gesso to get it ready for all the paint to come.
I then chose a couple of earthy colours for my background from Art By Marlene in Tuscan & Tobacco.
And then a little watercolour concentrate from Prima.


You can see how I added the colours in the video. Then I added some texture with some modeling paste. I grabbed a sheet of the Stamperia collectables paper and tore what I needed and then blended it into the tag background with more paint and some rubons. 


Once the background was complete, I chose what I needed to decorate the front. I knew I wanted to use butterflies especially since I had this beautiful resin butterfly from Kylie. So I made this my centre focus. I painted it in a couple of Stamperia colour gelsGold Dew & Star Blue.


I fussy cut some of the butterflies from the same collectables paper pad and then to make it look like one of those butterfly display boxes you see at the museum, stamped with Tim Holtz Field Notes to add the Fig.1 ect next to each butterfly.


I flicked with remaining ink and a few matching Prima watercolour concentrates.

I hope you enjoy the process video which shows how it all comes together.


Stay safe and Happy Crafting.
Em xx
 

Thursday 10 March 2022

'Embrace the gloriousness that you are' created for ScrappingClearly

 Hello there.

Em with you today, and firstly let me just say how much I adore this months mood colours!
They are so dreamy. Here is what it inspired me to create. 


And here is this months mood/sketch....


This week I only played with the mood board. I will save the sketch for later in the month. 
I kinda wanted to keep my project girly with a little grunge. I also wanted to play with some of the Art by Marlene goodies I received.


I used ABM Anemones So-fish-ticated stencil to start the page off. I mixed some Finnabair Mica powder in the pink and the blue powder with some light modelling paste and then spread through this very cool stencil. I wanted to create a cloud like effect with the 2 colours through the stencil background.


Next I added some more texture by rubbing some blue ink through a number stencil.


I added quite a few ABM stamps on to the background also to what would become my 'frame' for the photo and layers.


The layers behind the photo consist of a few torn pieces of an ABM sheet from her Bold & Bright Paper pack and a piece of book paper that I had added some Art Alchemy acrylic blue paint to compliment the background. 
Then I added some embellishments.


Now lets talk about this resin horse. I really wanted to continue the girly theme by adding something sweet. This prima merry-go-round horse was the perfect accessory. And I added a few layers of paint, rather thickly to create an old feel about it, slightly rustic, something of the past, a weathered look. Once the paint was dry I rubbed Finnabair Indian pink wax over the top. I love how it looks.

Once all my elements were in place, I flicked some Kitsch flamingo over the whole page along with some white acrylic also. And I added an ABM sticker quote.


I do hope this page inspires you to create this month. I look forward to seeing all the entries come in.
Have a great day and I will see you all soon.

Em xx


Tuesday 8 March 2022

Josephine created for 2Crafty Chipboard

 Hello 2Crafty friends!


Emma with you today, sharing a little 5x7 Canvas featuring some of the new pieces that were released earlier this year. I have entitled this canvas 'Josephine'.


I just love the chipboard and it's finishes on this project. Working on a smaller scaled canvas allows for the chipboard to be a lot more dominant.

Here are the chipboard elements I used.....

Zipper Frames
Foliage Set 9
Scribble Flower Set


To allow the chipboard to really pop from the canvas I painted them all in complimentary colours to match the background.


And then to make them stand out even more, I added some emboss powders to them. Firstly a pretty mint for the zipper frames.


And on the Scribble flowers a clear glaze was heat set to make them super shiny. This finish was also applied on the new foliage pieces. This makes the pink and greens really shimmer and shine.


I really love treating the chippy this way as it makes them really come to life.


I do hope this project inspires you a little. Thank you for joining me today.

Stay safe and crafty everyone.
Em xx