Thursday, 8 July 2021

The Beautiful Moments created for 2Crafty Chipboard with VIDEO

 Happy Thursday!

Emma today with you and I'm sharing a soft feminine layout with you all.


And these are the gorgeous chipboard pieces featured....
Clock Face Discs
Hand drawn Flowers
Window Shutter set 3


These pieces are just asking to be used and so i generously obliged...hehehe!


I started by prepping my chipboard with gesso. everything but the small clock face was primed with a white Gesso. The clock face was with a Black Gesso.


My choice of medium for the pieces to come to life was 3 different coloured Distress Glazes. 
The beautiful Window shutter was treated with all 3 colours starting with Vintage Photo, then hitting it in spots with a little Peeled paint, finally finishing it off with a light sprinkling of Antique Linen to really give it a Shabby Chic feel.


The flower and leaves only had the antique Linen and peeled paint. I love how on the chippy it just beads and shines beautifully. Lastly the Clock had Vintage photo and peeled paint, the colour doesn't pop quite the same on black but it sure does glisten!

You can see all the chipboard treatments and the layout come together in this video I made for you to enjoy. I hope you get a little inspiration from it also.


I will see you soon, stay crafty!
Em xx


Sunday, 27 June 2021

Let Life Surprise You - Created for ScrappingClearly


Hello ScrappingClearly friends!
Em with you today sharing a very easy Art Journal page. 

This page is made up mostly of the awesome Dress my Craft Transfer Me pieces. The Transfers you see on the page are from the Botanical Scripts collection. This was my first attempt at using these transfers as I was a little nervous using them. I thought they may be a little difficult to apply, but boy was I wrong! They work a treat!


I layered them on after I had primed my page with White Gesso. And I overlaid them like I would stamps or any type of collage system. Once I had added all the transfers I wanted, I applied a coat of Clear Gesso, as this 'sets' the transfers ready for the mediums layered on top. With some modelling paste I used a stencil from the Stampers Anonymous Mini set 30 for a soft vintage feel.


I added 2 Distress Oxide sprays to compliment the soft colours in the transfers, and travel through the stencil work. These colours were Speckled Egg and Mustard seed. And these were activated with water and then used like a water colour over the page. Dabbing away any excess or to lighten the shade of colour. Once these were dry I began to layer some stamps. These were from 2 different collections, some from Stampers Anonymous Field Notes set and Art Daily - Carte Postale set.


I finished with a  Butterfly Layer and a couple of Small talk stickers, and a good flicking of white paint. 

If you have yet to play with these transfers, please do as they are just amazing! Super easy, super effective and super gorgeous.

Happy crafting everyone!
Em xx


Sunday, 13 June 2021

Hope is Never Lost - created for ScrappingClearly

 Hello all!

Em with you all today with an easy and quick Art Journal page based on this months Moodboard.
How this moodboard speaks to me! The colours the images are just so warm and wintery and typically me, as I live in the country this board reminded me of all the quaint homesteads and warm winter fires and the barn owls that Hoot through out the night. Something rather romantic about it all. Anyway enough of that! Here is what I created in my Art Journal.


I went back to some of my old trusty techniques that made for a quick page. First I added White Gesso onto my page, Then stripping pieces of the Ideaology Typography Collage paper adhered that with Gel medium, along with torn washi from the Ideology Butterfly collection. This was now my focused area on the page.


Then came the colour. Using 3 Distress Oxides - Vintage photoPeacock feathers & Rustic Wilderness, I smooshed the colour with a little plastic and water. I forget how awesome this technique is and love the watercolour effect it gives. Once dry I then chose a few pieces from the Ideaology field notes ephemera pack and created a collage behind my image. This image I have used a couple of times but when I saw this moodboard I just had to use it again as it matched it beautifully.


Finally instead of stamping I chose to use the specimen remnant rubs to tie the background and image together. I added my title and a few flicks of Vintage photo over the completed page and this page was done! Quick, simple, and effective. What a great way to play with this moodboard.


Come join in the fun with this delicious colour board, we love seeing what you create with it. 

Till next time, stay crafty! 
Em xx


Monday, 31 May 2021

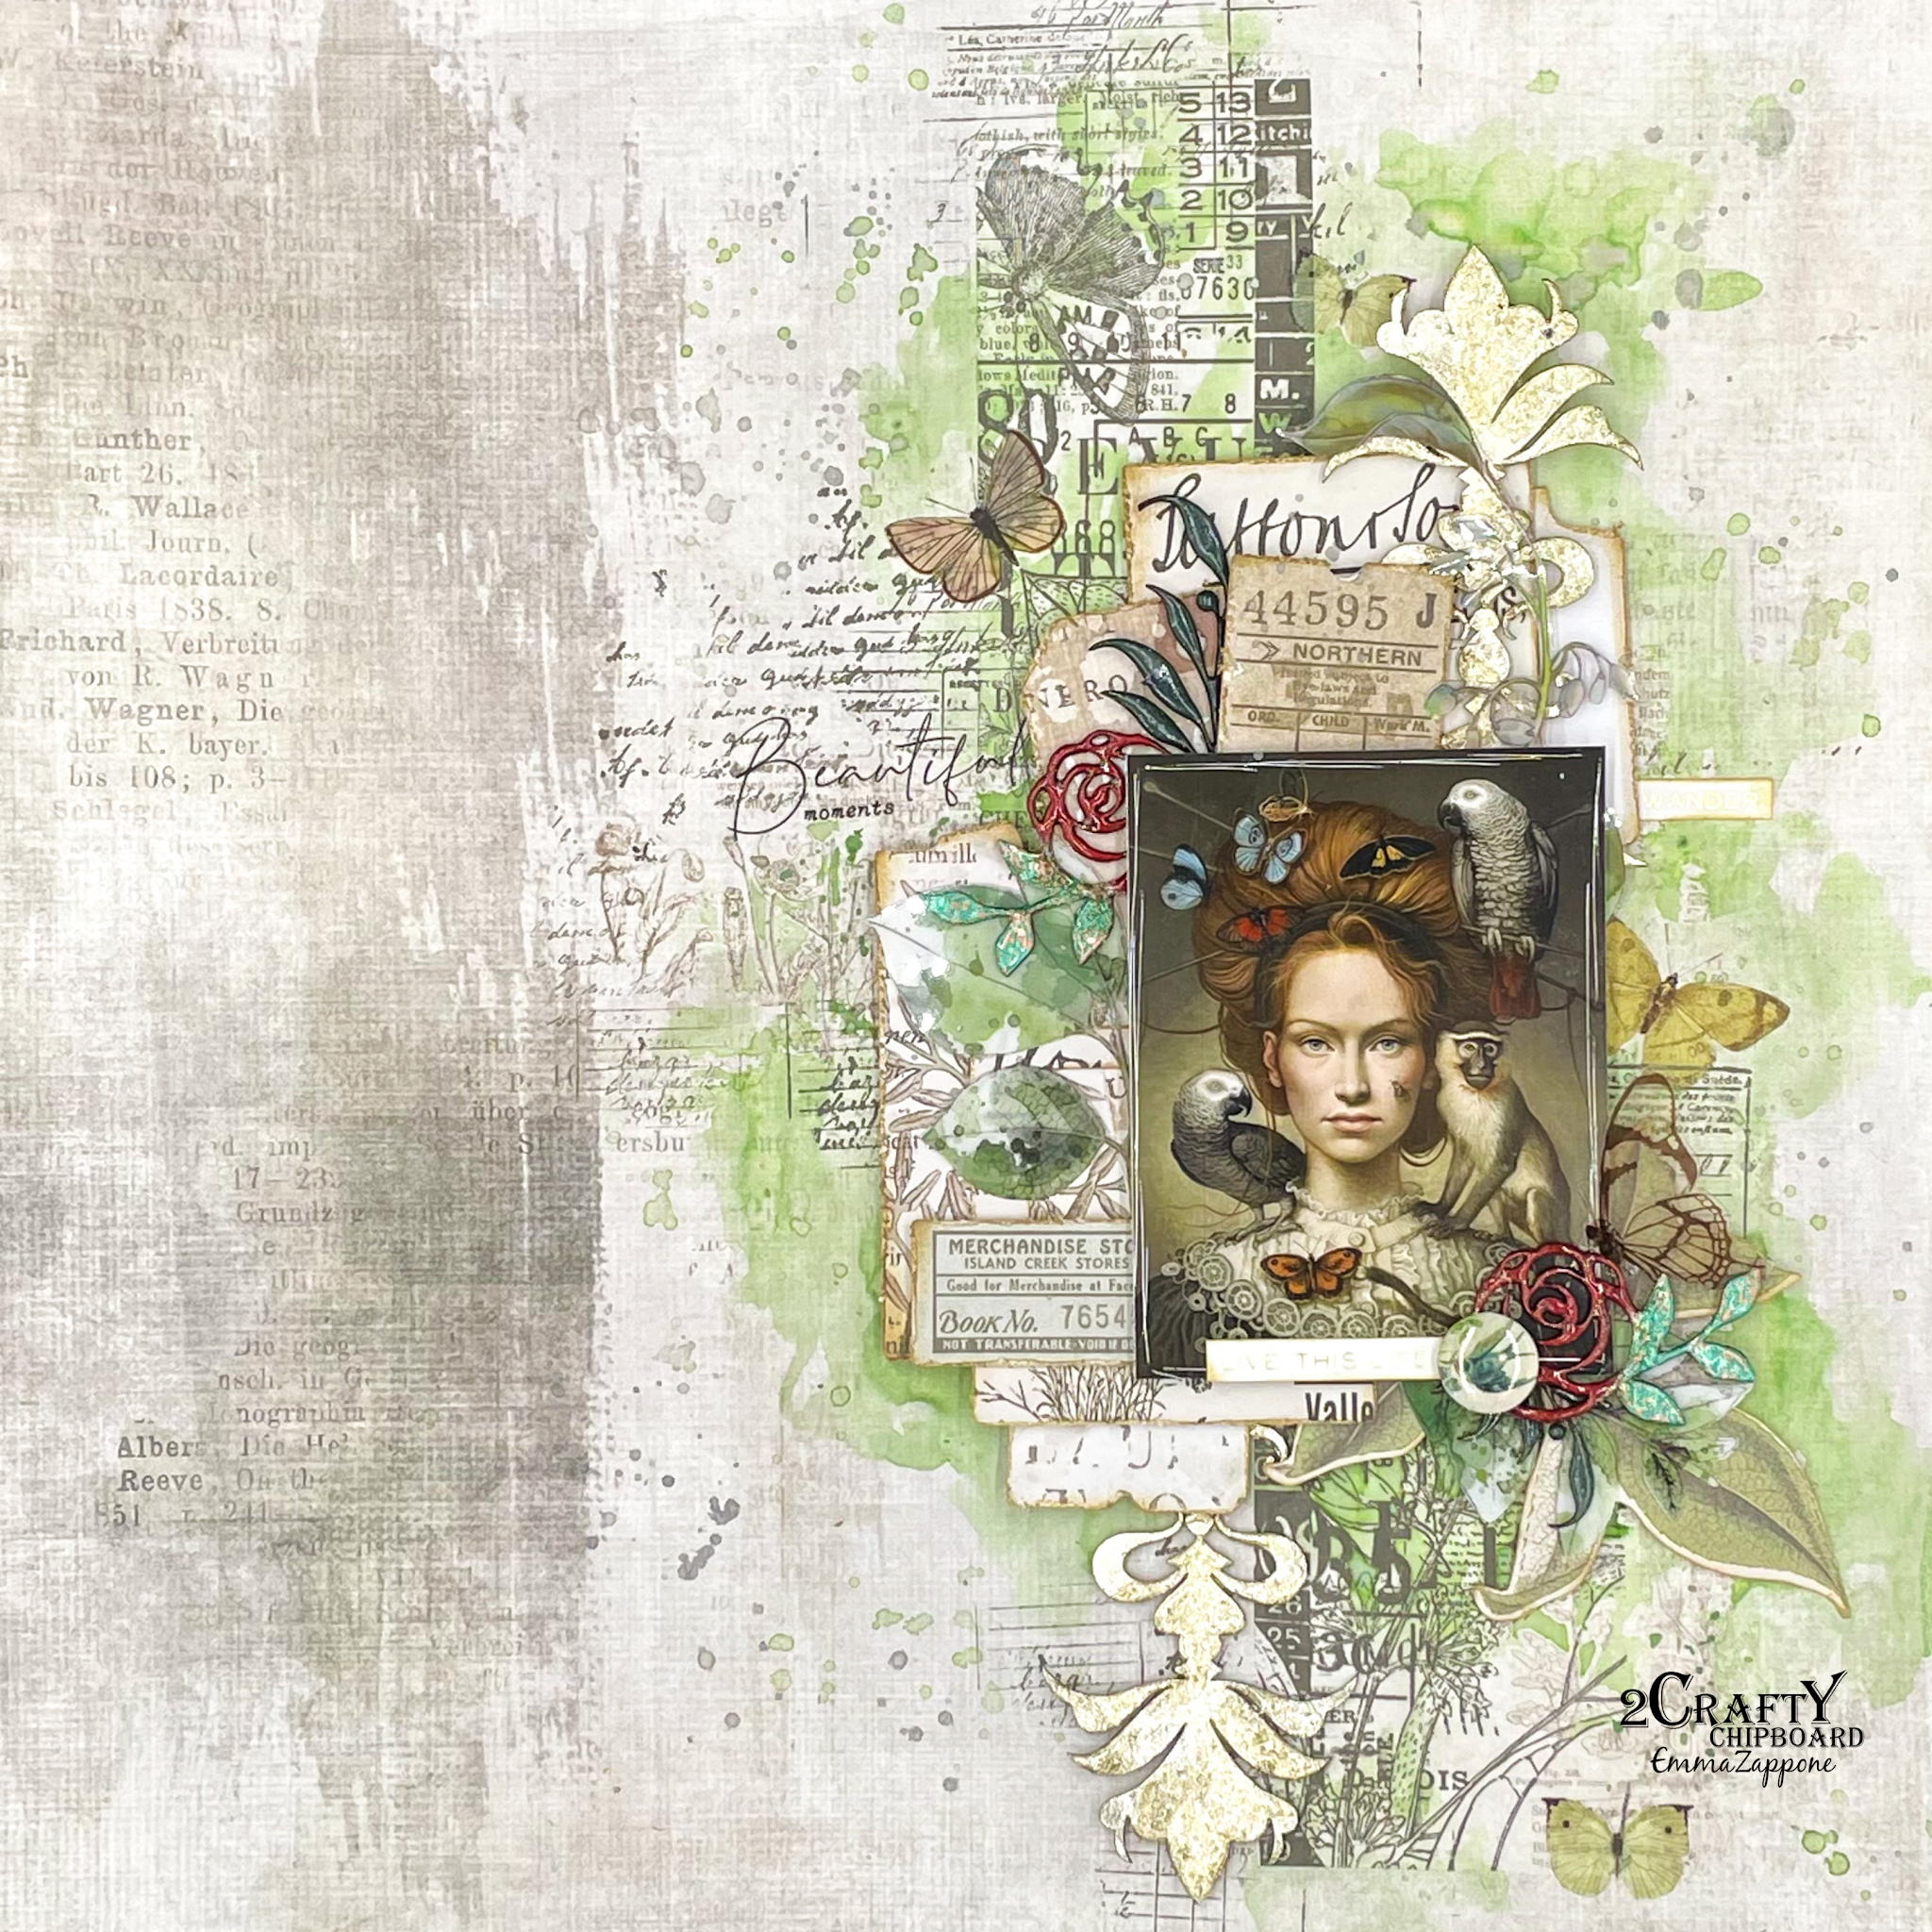
Live this Life Created for 2Crafty Chipboard

  Hi 2Crafty friends,

Emma with you today on this last day of May.
Sharing a page I created with soft tones and awesome chipboard.


Here is the fantastic chipboard that is featured on this page.....
Border Tribal Ornate
Foliage Set 6
Rose Set 2


These pieces of chipboard are pretty and so I wanted to keep them that way. The finishes on them are simple yet elegant and kept them on the feminine side.


I used a variety of acrylics and emboss powders to get the desired effects on the chippy.


For the Roses, I really wanted them to stand out and be that slight point of difference from the background colours yet compliment the colours in the photo to then meld the background and image together.


I hope you have an amazing day and have been inspired in some way.

Till next time, Em xx


Sunday, 30 May 2021

A little POP culture created for ScrappingClearly

  Happy Sunday friends.

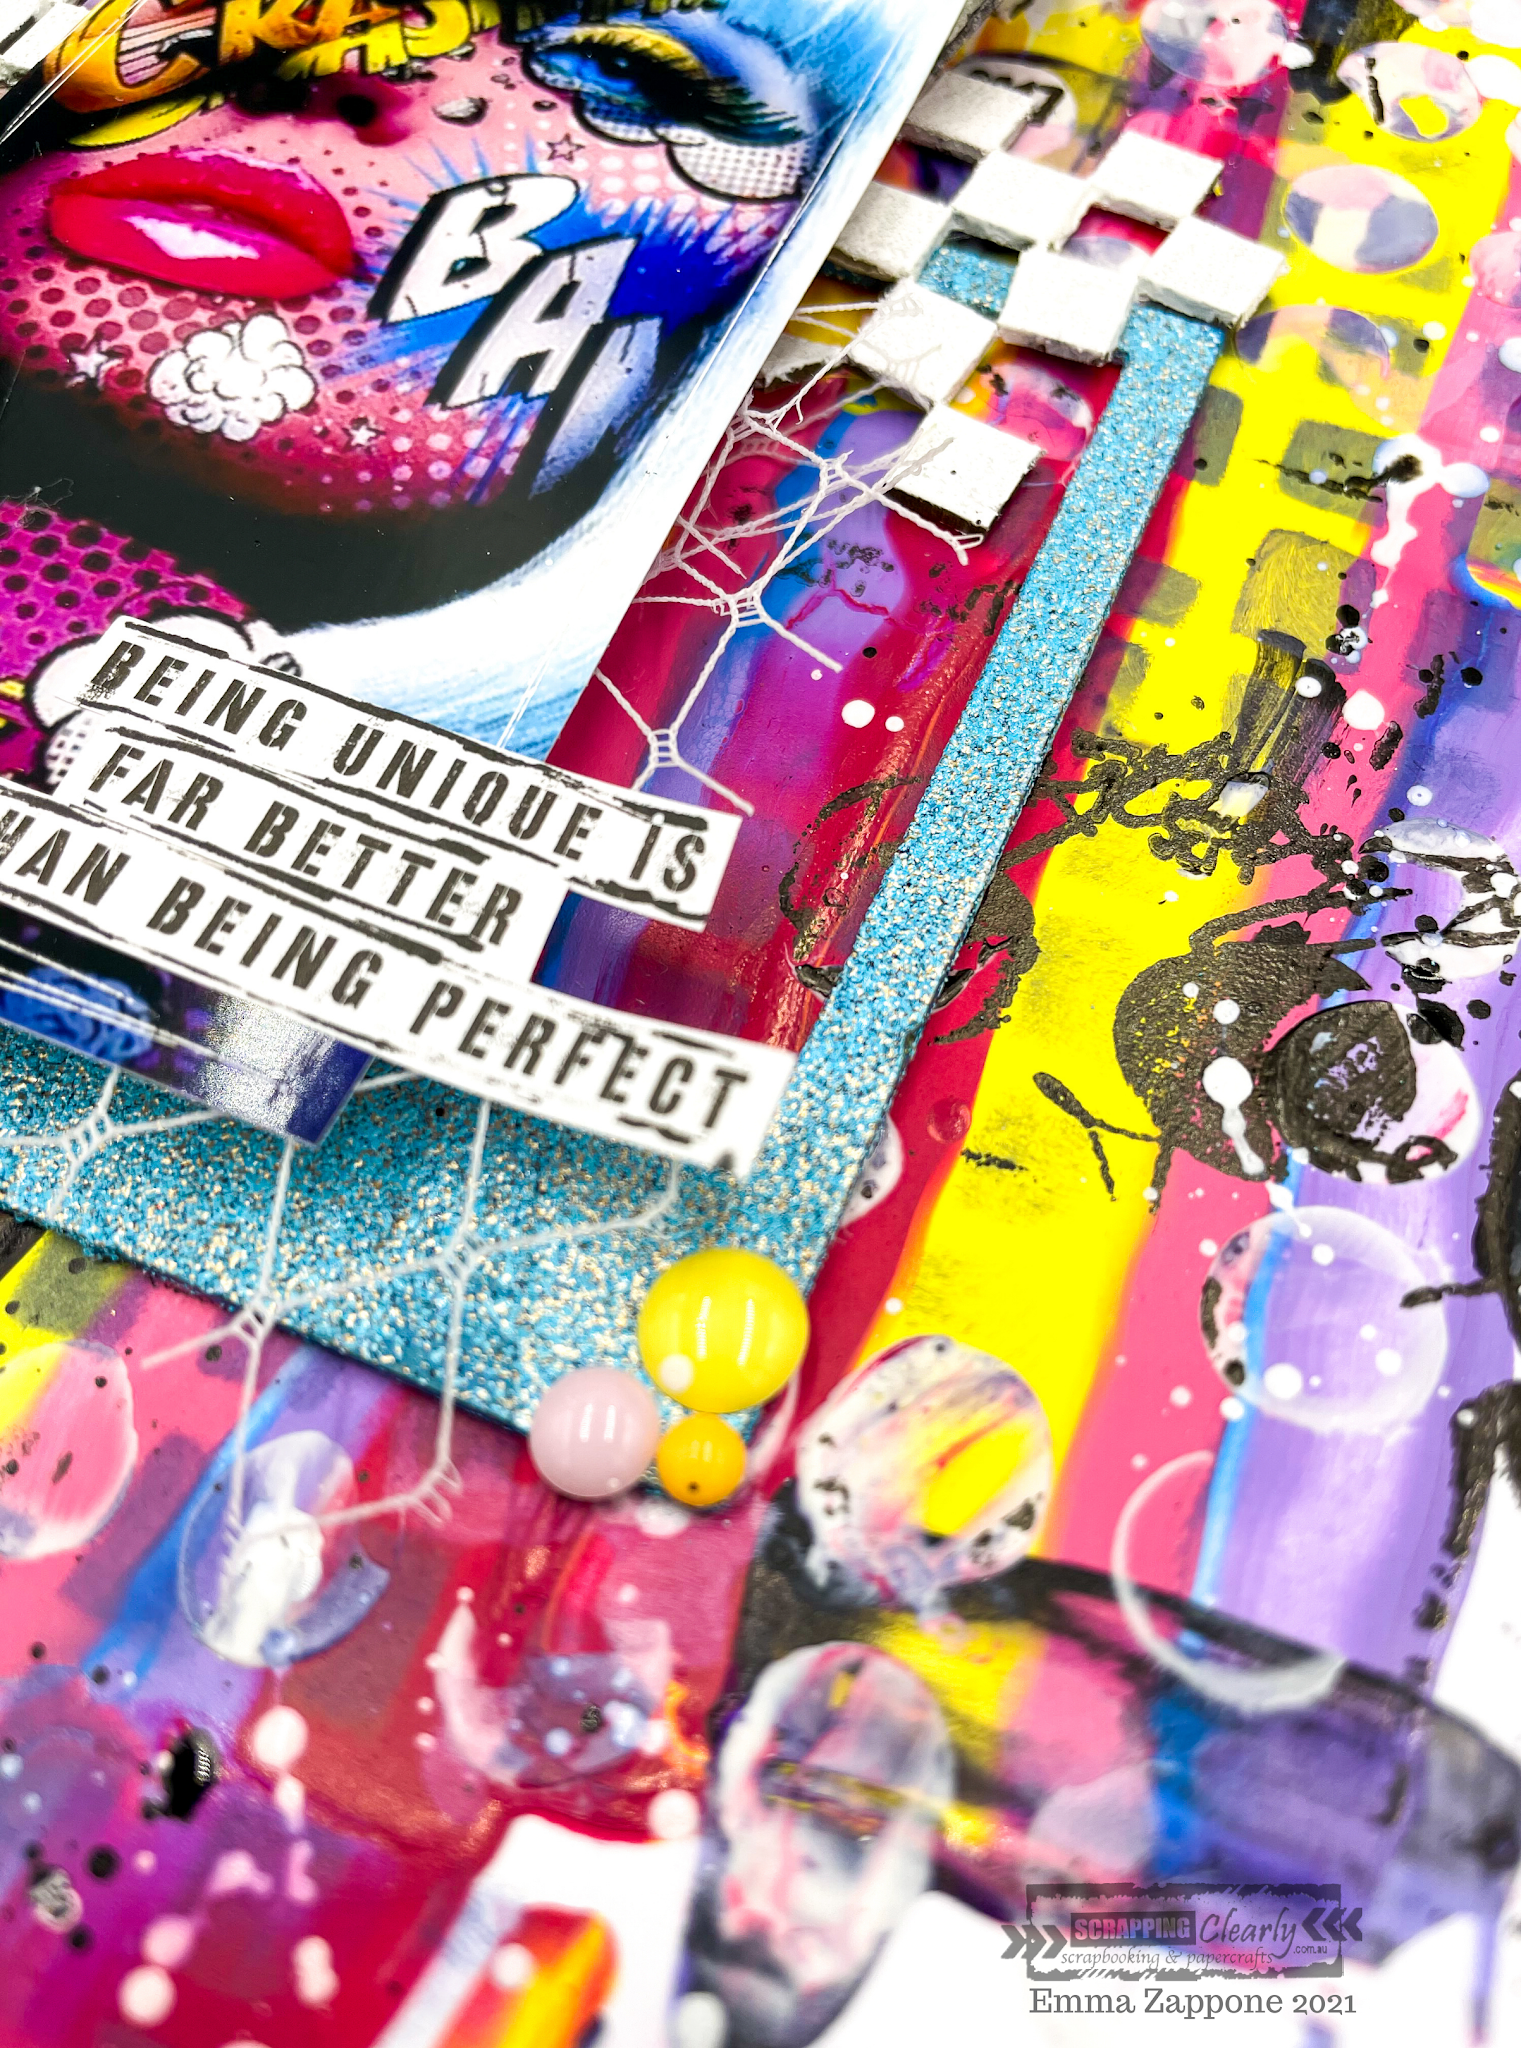
Emma up on the PF Blog with you today with a bright POP layout.
Using lots of bright colours and a few old school techniques this layout came together nicely.


I'll now show you how I created it.....


I started by adding a sheet of Art by Marlene Collage Paper to an A4 card. And once dry created some tags out of it that would match my layout. Next came the colour! Using Dylusions paints (lemon zest, blue Hawaiian, peony blush, laidback lilac, cherry pie & black Marble) I dotted the colours in a straight line and then using a palette knife dragged the colour down the page. Then I flipped the page upside down and using the knife once more dragged them toward me again. Wiping the knife in spots to create an abstract feel.


Once the paint was dry I started to build layers with stencils and stamps. First was a couple of Dylusion stencils with Distress Oxides in Chipped Sapphire and Kitsch Flamingo to mark make. Once the Oxides were dry I grabbed some Modeling Paste and using a circle stencil went through in random but strategically placed sections😉


Then choosing a section of the HUGE Aall & Create Scribble It stamp, stamped in the areas that the modelling paste was laid. And then I started the composition with the tags made earlier and some chipboard elements. I love layers and this page has that for sure.


Once all my chipboard pieces and fabric were glued in place, it was time to add some story to the page, and what better than the Studio Light artsy Arabia sticker Quotes. These have so many awesome quotes, I had to use 2 to tell the story.


I dug around my stash and found the good ol' enamel dots that I prettied the page up with a little. Finally a few black & white splashes and this bright POP page was complete. 


Bright and fun for this last Sunday of May.

Thanks for joining me, happy crafting and will see you next month.

Em xx


Sunday, 16 May 2021

Let Life Surprise You - designed for ScrappingClearly

 Hi, Em with you on the SC Blog today.

And today's focus is on the Mood board and all things Tim Holtz.
My project is made up of only Tim Holtz products. It was a lot of fun putting together.

Here is the beautiful mood board I was inspired by, I was inspired by the rustic colours in the panel with the butterflies mostly.

I started by using An A4 piece of white card and then started to tear pieces of Tim's Idea-ology Collage paper, 2 different ones were used, they were - Typeset and Typography.
Once I was happy with the amount stuck down I then added a couple of washi tapes to it. 

After adding a layer of clear gesso and completely drying it, I added some colour. I really wanted to play on the orange aspect of the board, so using Distress Oxides I actually started with Vintage Photo around the border first. Then with Carved Pumpkin I blended over the top of the Vintage Photo and in through to the collage paper.
Then flicking some water and removing the moisture created a distressed look.

Next I added a pop of colour through a Tim Holtz Stencil, I used Eye Chart with Distress Oxide - Peacock Feathers. This added a cool effect without using modelling paste.


Stamping was next. I chose an assortment of stamps from the Stampers Anonymous range - Field Notes and Glitch1. Glitch1 stamps were stamped with Distress Oxide Crackling Campfire.


For my layers and embellishments, this was using a variety of elements from the Ephemera pack - field notes. This is such an awesome pack as you have 'tags' and butterflies and bugs to flowers. It covers so much. And has beautiful colours. I chose only those that went with this mood board.


Finally the title I added using a couple of stickers from the Idea-ology Small Talk range. These are perfect for story telling which I love to do.


Have you had a play with this months board yet? We would love to see your take on it.

Catch you all very soon, Em xx


Sunday, 2 May 2021

Make It Count - created for ScrappingClearly

  HI!

Em with you on the blog today.
 It's been a busy time for me of late and to add to it I have lost my crafty vibe, until now.........
So because I really just wanted to craft and get things on paper, I decided to go simple. 
Minimal mixed media and lots of stamping made for a quick layout.
I even filmed it coming together, which I hope you enjoy watching.😆


Using lots of stamps on my base sheet, creating a suitable backdrop for this awesome image I found on Pinterest. I started with an Aall & Create stamp - Gears & Elements and stamped it vertically across my page. Then to add to the grunge a little more I added a few of the stamps in the Stampers Anonymous - Glitch 1 set. 


At this stage there was no colour. Before I started the layout,  I had grabbed a piece of watercolour paper and with a couple of Scribble Sticks 'scribbled' and added water to it which eventually I created into the 2 tags seen behind the image. You can see me make these in the video. With the excess colour I flicked it to the background of my layout to add just a subtle hit of colour.


On the watercolour sheet I also stamped a few stars and the little bird from the Aall & Create - Wire birds set, ready to cut out and become my embellishments.
I really wanted another hit of colour through the stamping across the page, so using the chevron stamp from the Aall & Create - Take Flight set and Distress Oxide - Faded Jeans for the colour added it amongst the stamping layers. This complimented the pop of yellow/orange of the image.


Once I had fussy cut the bird and stars from the watercolour paper and stuck them down, I again added a small amount of colour to them. Using the 2 original scribble sticks from the start, I created a watercolour out of them and just dotted colour onto them. 
My final embellishments were a couple of metals, one a door knob and the other a faucet.
Finally a couple of quotes from the Tim Holtz - small talk stickers.

And that was this layout complete.

I stood back.....and felt relieved to create and happy with the final result.

I hope it has inspired you to create, and if you feel stuck just to try something simple and easy. There is no shame in that, just feel good about creating!

Enjoy my process video too and hope that it inspires too.


Happy crafting everyone.

Em xx