Thursday, 30 September 2021

'Beauty' created for 2Crafty Chipboard

Hello! Hope you all are doing ok.
Todays share is a colour combo that is a personal fave of mine.
And it features a technique that makes for an easy scrapbook page.


Here are the chipboard pieces featured......

Leafy Shrub Set2
Chunky Hearts
Crazy Circles


The background of this page is using the simple technique of smooshing oxide inks with a piece of acetate on to the white cardstock. 
And because I liked the simplicity of this page I kept the chipboard simple also with the finishes.


I primed all the chipboard pieces with white Gesso to start with. The Leafy Shrub pieces I dabbed a little Oxide Ink straight over the top of the white gesso once it was dry. The colour of the oxide really pops when over the Gesso. I also loved how your could still see the contrast of the white in sections of the chipboard.


The big Crazy Circles panel was also primed with white Gesso and then, with an old tattered brush added white crackle paste. I use an old brush for this because it adds the crackle thickly and thinly to the board without the hassle of purposely doing it. 


Then once the crackle was dry, colour was applied. I used 3 different ink sprays and a liquid acrylic to add depth to the crackle texture. Once happy with the level of colour I added just a hint of wax over some of the heavily cracked areas.
The Chunky heart on the picture has the same technique applied to it.

I hope this page has inspired you a little today.
I look forward to seeing you all again real soon.

Take care, Em xx


Sunday, 19 September 2021

Take Chances created for ScrappingClearly

 Hi there, Emma here with you all today.

Today is a share which is inspired by this months moodboard. I love a monochrome theme.
Today's creation was created in my Dylusions square Art Journal.


Here is the glorious mood board for September.....


I love all the pattern and texture featured. I saw the flowers in the tile of the image and also the patterns and string line effect, these are what inspired me the most.


These flowers are a fussy cut out from an awesome stamp I have. And these were to be the main attraction to my page.


The background started with a coat of white Gesso. Then a mix of assorted stamps including the awesome Aall & Create take flight collection. I layered all my stamps over the top of each other to create a dimensional feel.


I wanted more texture so I added some Finnabair Jewel Texture paste in sparling onyx through a Tim Holtz mini stencil.


Once all my stamping and texture was dry I grabbed a fine line pen and scribbled in areas of my page to replicate the lines in the moodboard. I must admit that I was a little apprehensive at first and then I just went with it and loved how it tied in with some of the stamps that have a similar effect.


To bring it all together I added a few Small Talk stickers to tell the story of my creating.

Hope you are having lots of fun creating with the moodboard and I look forward to all your creations.

See you all again soon.
Em xx


Thursday, 9 September 2021

Your Crazy is showing - created for 2Crafty Chipboard

  Hello, Emma with you all today.

Today is a share that's a little quirky with bold colours and plenty of black accents.


These are the chipboard pieces used.....
Aztec flowers set1
Mini checkerboard pieces
Mini Branches


With such a colourful background I knew that Black would be the best contrast. So that's what I did. 
All the chipboard pieces were painted in black Gesso to start with.


The checkerboard pieces didn't have any other medium added, the flat black colour was a great feel to the background work and tags.


This beautiful Aztec flower is so stunning so I wanted to add just a little colour to it. I added a light dusting of Distress Oxide to it, in the same colour as the edges of the tags.


The branch also stayed black but I drew fake stitch lines around the edges to create that interest and stand out a little more from the background.

I hope that today's share inspires you a little.

Have a great week everyone.

Em xx


Monday, 30 August 2021

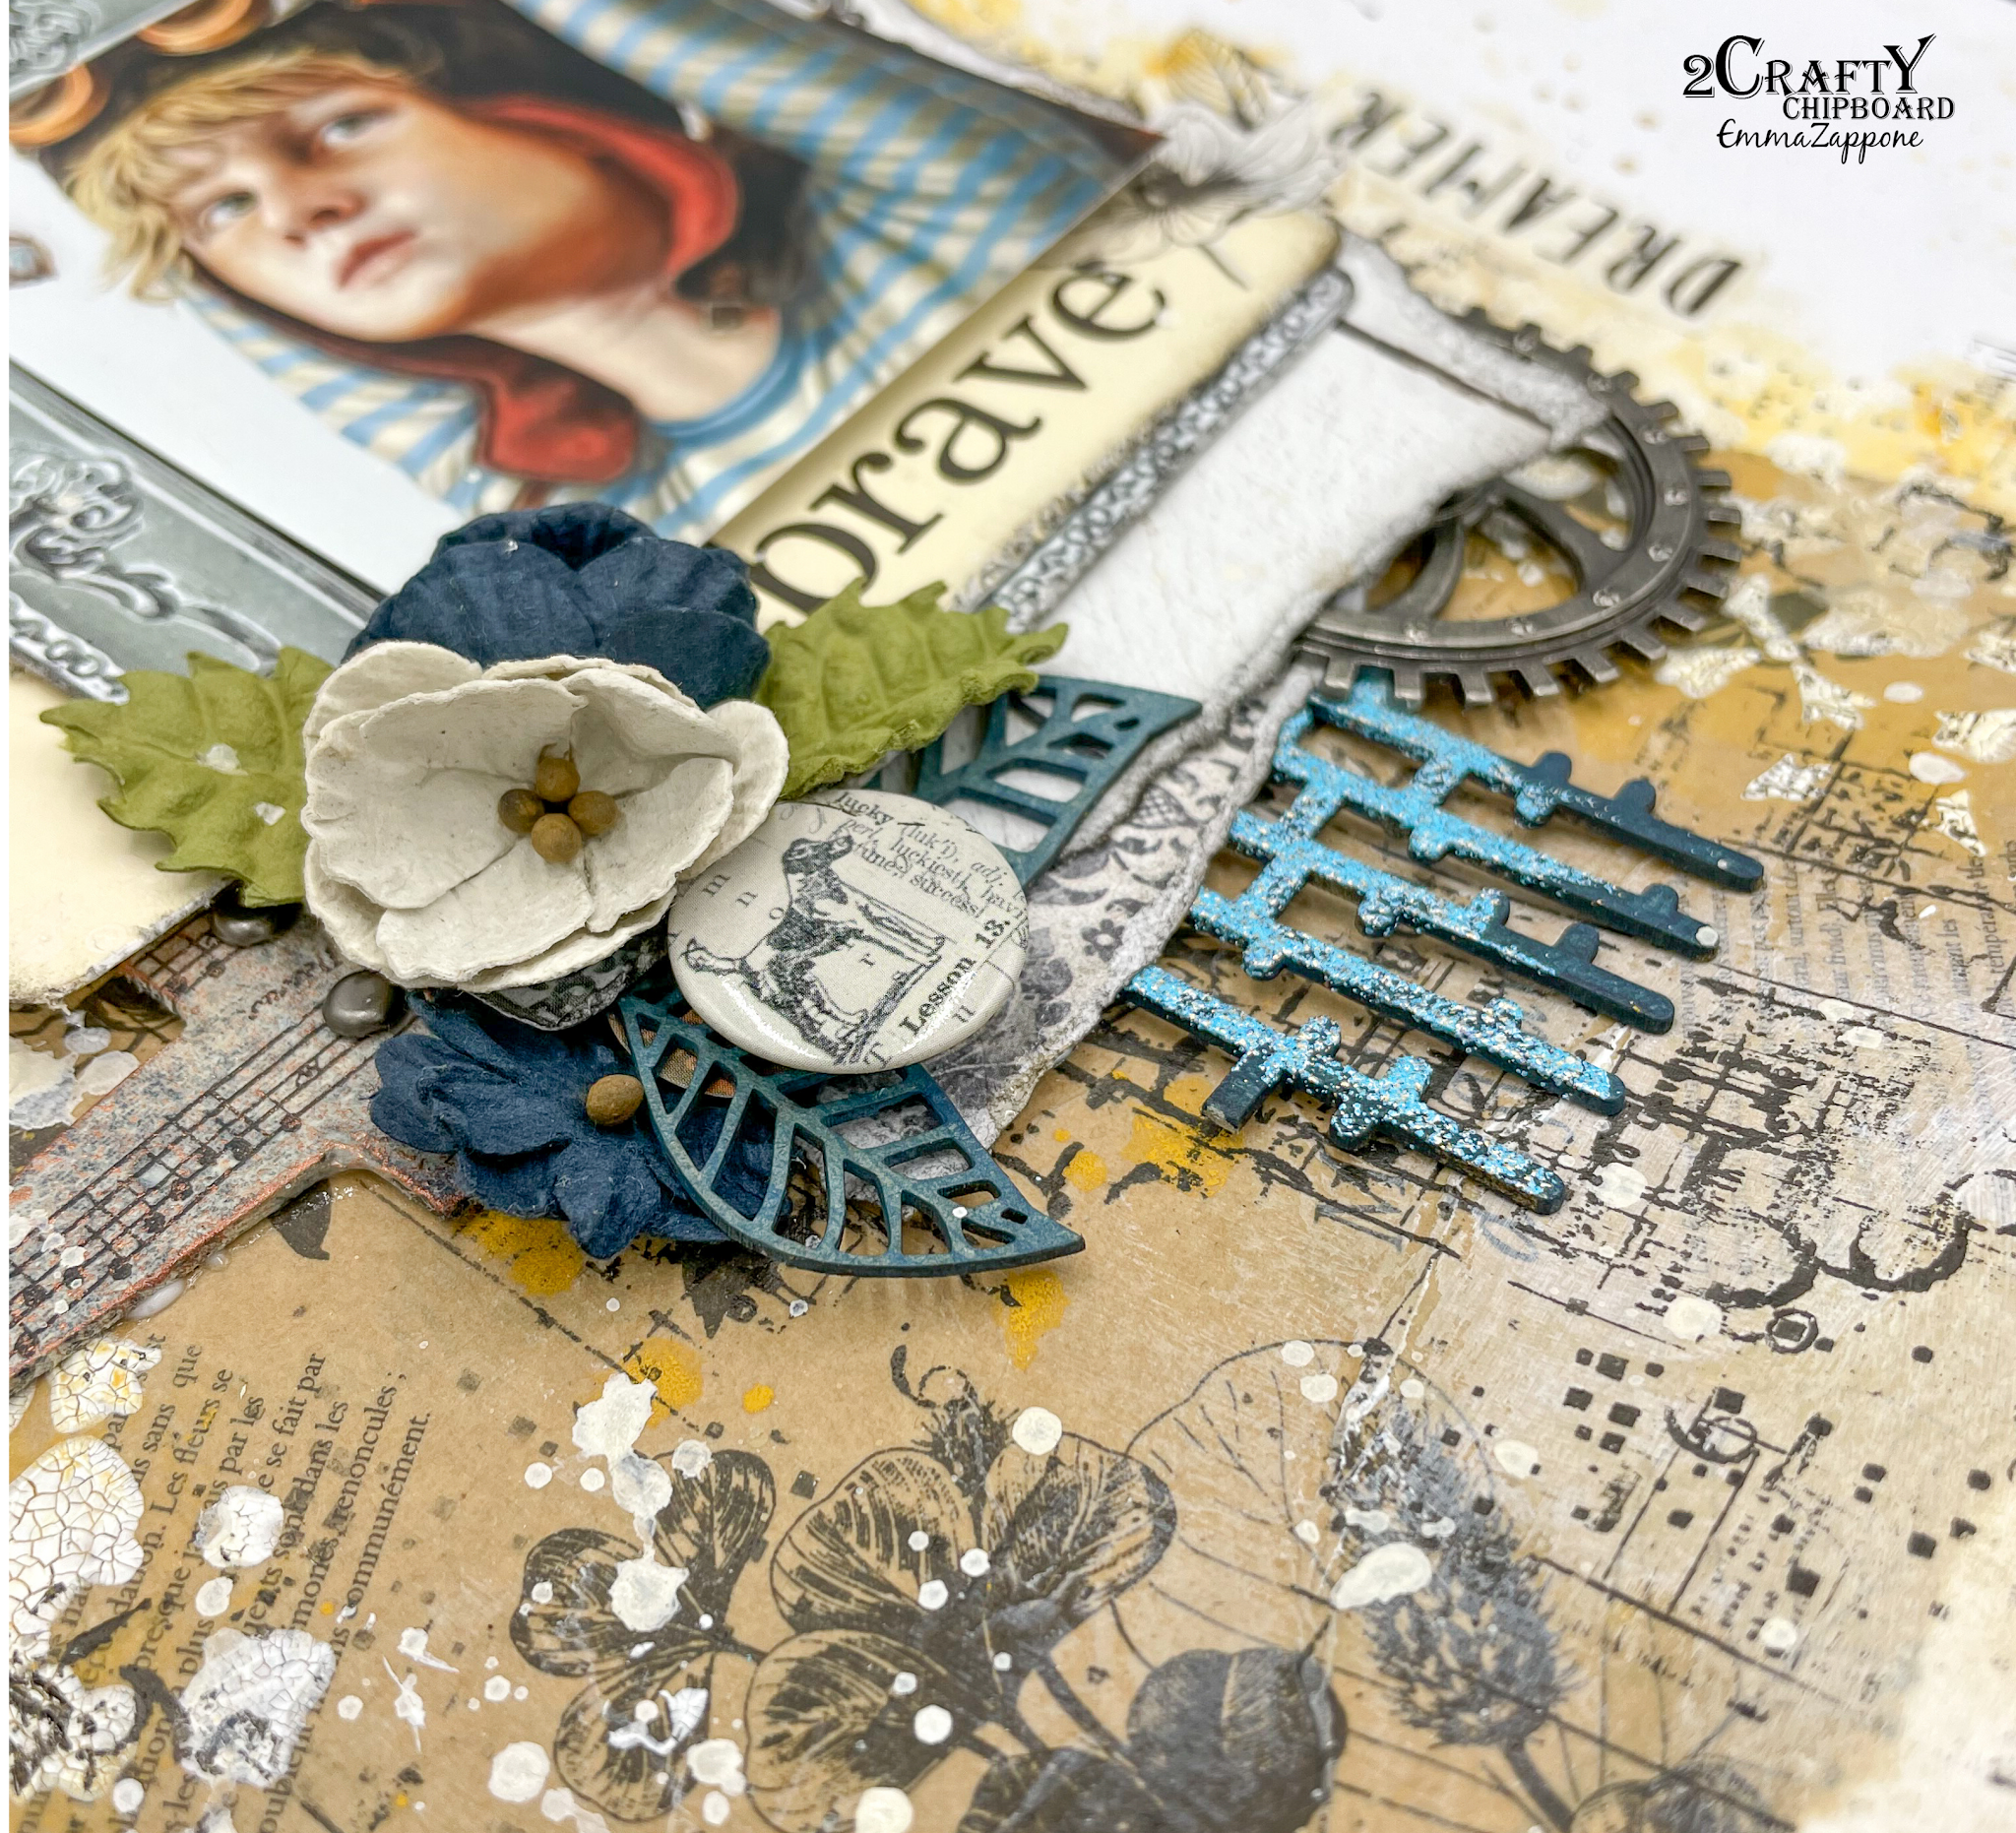
XOXO created for 2Crafty Chipboard with bonus VIDEO

Hello everyone!
Emma with you today and today I'm sharing a layout that has a relaxed spring vibe to it.
This page features an upcycled paper that was wrapped around a bunch of flowers I purchased recently. Here is my project that will hopefully inspire you a little, plus a video to share how this all came about.


And here are the chipboards featured in this page:

Crazy Stitched Panel
Lattice-leaf set
Steampunk Gears medium
Hinges pack


Firstly I tore the flower wrapping paper in a strip to use in the middle of my white cardstock. This is where the base of my inspo came from. Then I stencilled in a few spots and painted some white Gesso with my finger to blend the paper into the background cardstock. 


Lets talk about the treatment of the chipboard. The Stitched panel once trimmed down for me to use, started with a coat of acrylic paint in a Prussian blue. Next I dotted it with some emboss ink and using a Turquoise powder  and embossed this lovely piece of chippy. 


The Lattice leaf I kept simple. I applied the same blue I used on the panel and then with a powder blue acyclic, blended the colours together to create a more grey blue colour which was a great compliment to the image I used.


For the Gears, these were painted with an acrylic brown and then 2 waxes were applied to give them the richness in colour and again match in with the image. And finally the Hinges, these were again  painted in the Prussian blue. Then with a napkin and some gel medium, I altered the hinges. I love this effect and love the vintage feel that it offers. I also rubbed a little wax over them once dry.


This page has plenty of layers and embellishments to compliment the chipboard and tie all the elements together. You can see how all this comes together here in my video. I hope you enjoy it.


Thanks for joining me today. I will see you all again very soon.
Em xx


Sunday, 8 August 2021

I am extraordinary designed for 2Crafty Chipboard

 Hello, Emma with you today.

Today's share is bold and bright, with a little sass thrown in.


These are the chipboard pieces used.....

Square Collage Panel
Lattice Leaf set
Border 6" Floral Cluster


My page is an A4 set as landscape, something a little different in size and design.
As the background is quite bold and bright, I wanted to make sure the chipboard elements stood out.


For the square panel I painted these with black Gesso and then with my finger just lightly brushed over some white Gesso. Once these were dry I then clear embossed them to make them shine and stand out from the colourful background.


With the gorgeous floral border I decided to cut the flowers apart and make them individual pops of colour on the squares. To colour these, I painted with an assortment of acrylic paints that I had used on the background paper. Again painting and blending with my fingers.
Once dry, I again clear embossed them.


And then finally the stunning lattice leaves! I used the similar acrylic paint techniques as the other chippy on the leaves and clear embossed. I really love the way all the chipboard shines above the coloured background and really owns the page!


I hope you found a little inspo from this page and I will see you all again at the end of the month.
Stay safe, stay crafty.

Em xx


My Darling created for ScrappingClearly

 Happy Sunday all! Emma here with you today sharing a page inspired by this months glorious moodboard. It has the warmest shades of mauve, purple and grape. Colours that usually would have me running, but this time I decided to really embrace them and make them my own.

Here is the moodboard.....


To achieve the different shades of purple, I used a variety of different products. But lets start from the base sheet up. I primed by paper with a clear gesso and allowed to dry. Then with a couple of different stencils added a white crackle paste and again allowed to dry. Once dry I then used a Distress Crayon - seedless preserves and a touch of Dylusions crushed grape ink to create a dramatic effect on the crackle paste.


To add a little warmth I watered down a small amount of Art Alchemy Metallique romance pink acrylic  with a fine brush, dotted in amongst the other shades of purple.


I used a number of scrap pieces of paper from all sorts of brands to achieve my layers behind my image. The chipboard is painted with the Romance pink acrylic, I primed all my resin pieces with black gesso and then brushed Prima waxes once dry. these were a combination of Heather Hills and Amethyst magic. It created such an awesome finish. 


Once all my embellishments and flowers were in place I dry brushed a little white gesso over a lot of the elements, this allowed me to then add a touch of wax over the art pebbles and other embellishments.


Lastly a few Finnabair micro beads and Prima pearls to add a soft touch. I watered down a little of the Distress crayon used on the background and flicked this around my layout to tie it all together.


I hope this page inspires you a little to try a colour that may not be your first choice or one that you play with often, but that's what makes a challenge like this so much fun.

Catch you all again soon, Em xx 


Friday, 30 July 2021

Follow your Bliss designed for 2Crafty Chipboard

  Hello!

Emma with you all today on the blog.
Today I share a magical 9"x12" Layout with you all.


This layout features some stunning chipboard!
Clock Face discs
Florence Swirl set
10" Decorative panel Doily 1


I was a little nervous using such a large piece of chipboard with the doily, and wanted to do it justice. I I knew I really wanted to antique it up. I applied a crackle paste and allowed it to dry naturally. Once that was dry I then applied a combination of Oxide inks and ink sprays to add the colour tints.


Love how the colour seeped in through the cracks. Once the colour was dry, I lightly rubbed a copper wax over the surface just to grab some of the texture.


I then prepped the other 2 pieces, the clock face and swirl, with black Gesso.
Once dry, I then applied a couple of waxes to illuminate them yet compliment the large doily.


Once these pieces were all ready, I then layered them into my layers and visual story.


I loved taking my time creating this layout and love the feel of the end result.

I hope this layout gives you a little inspiration.

See you soon, Em xx